Category Archives: Perfect Quilt

Tips and tricks to create your perfect quilt

Quick cutting with AccuQuilt

Who wants precise, trimmed fabric pieces so they can start sewing blocks?

If that’s you, come on over! We have a wide range of quilt dies so you can cut quilt pieces quickly with AccuQuilt.

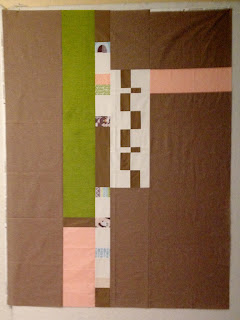
Louise purchased the Studio Cutter 2 shortly after Burlington Electric Quilters opened its doors. She loves the precise pieces and already-trimmed corners. Here are a couple of the quilts that used AccuQuilt for quilt piecing.

Never heard of AccuQuilt? Well, get ready for some eye-popping advantages.

  • This quilting tool slices your fabric cutting time by up to 90%. Whenever she has half square triangles, the AccuQuilt is Louise’s tool of choice.
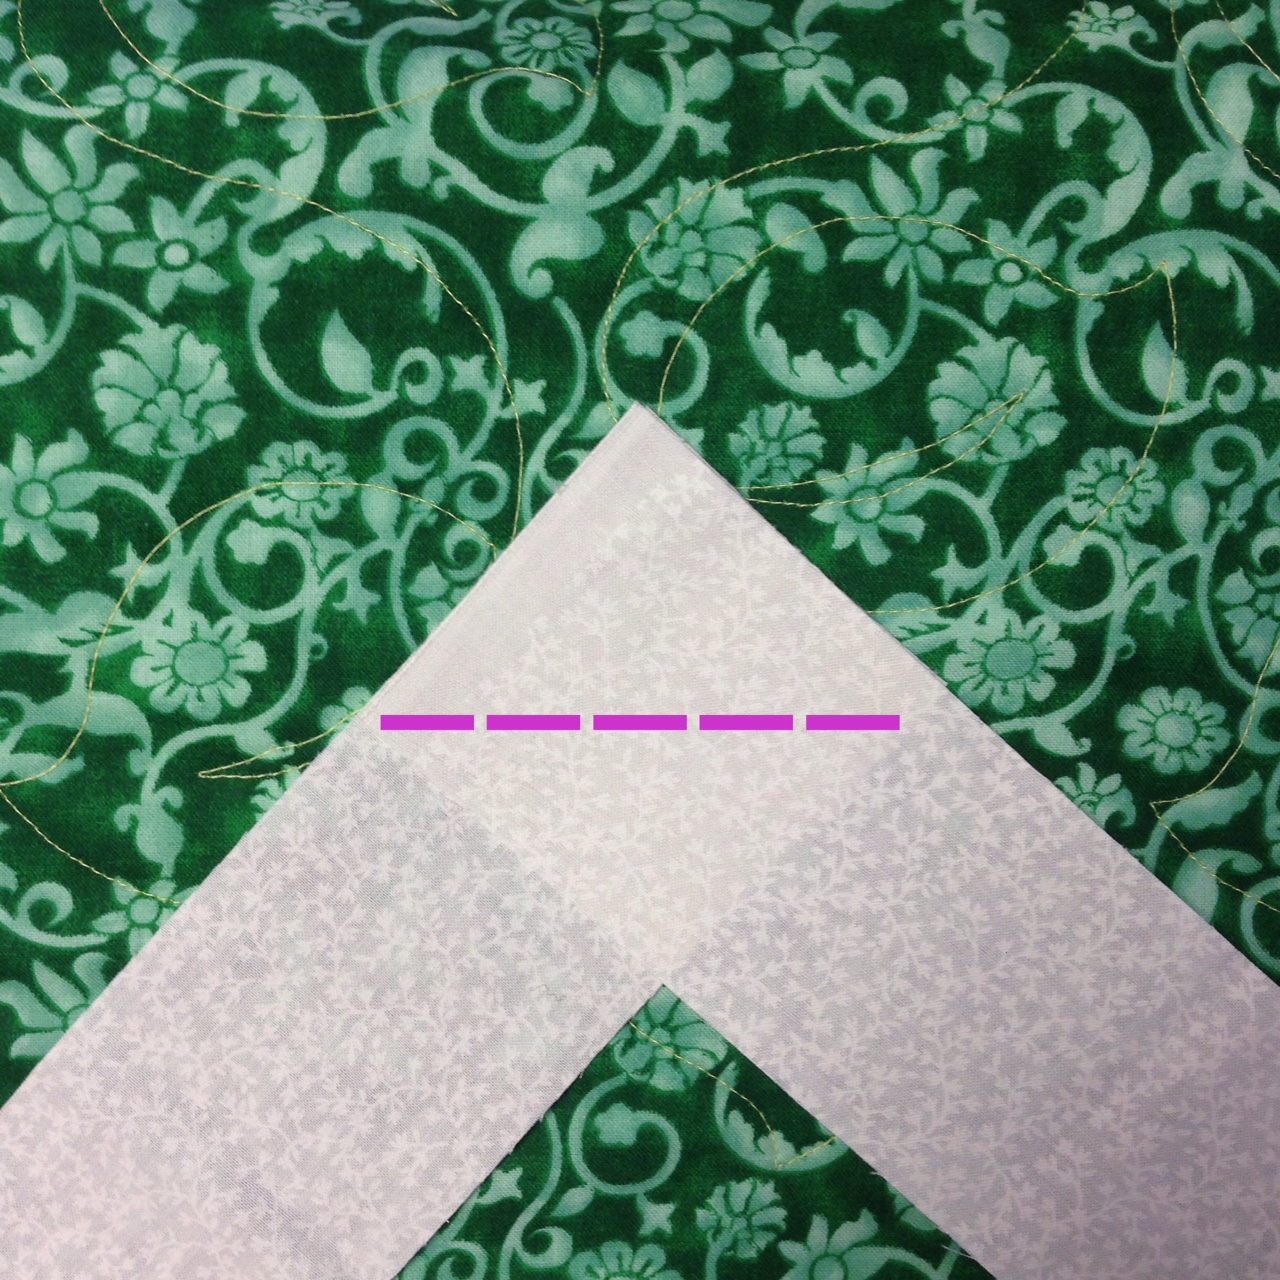
  • It trims the corners of pieces, reducing the time it takes to sewing components together.
  • It’s easier on your wrists and shoulders than rotary cutters.

How does it work? Watch how the AccuQuilt cutter slices so many triangles in a snap.

See how quickly Ohio Star block pieces are cut using the AccuQuilt cutter

The AccuQuilt Studio 2 Cutter at Burlington Electric Quilters has hearts, squares, parallelograms, triangles and more shapes to meet your piecing or appliqué requirements. If you’ve got a specific block in mind, let Louise know, as she probably has the right mix of dies ready and waiting.

Ohio Star quilt made with AccuQuilt by Burlington Electric Quilters
Ohio Star quilt top

Ready to learn more about the AccuQuilt? Their website has plenty of how-tos, free patterns and encouragement to get you started. Then turn to your stash and play with the possibilities.

AccuQuilt pieces are a great way to use layer cake, jelly roll and charm packs – not to mention the fat quarter bundles that your stash may be hiding.

Linda C came into the studio last year and thought it was a “game changer.” Cutting half square triangles quickly excited her for new quilt patterns.


“Bring on the patterns full of Half Square Triangles,” she declared.

Maybe you don’t want to start a new quilt, but turn to your WIPs with new inspiration. Want a flying geese border for a king size quilt? Suddenly this could happen in just a fraction of the time. Or maybe you started a T-shirt quilt and haven’t trimmed the blocks. The AccuQuilt cutter makes that job easier, too.

Are you ready to cut quilt pieces quickly? The first five people who leave a comment on the blog post will receive a free hour on the AccuQuilt cutter.

Leave your comment, gather your fabrics and get ready to cut quilt pieces quickly with AccuQuilt.

3 Ideas for Pieced Quilt Backs

Is there something in the air? Is it spring madness? Lately, we’ve seen some tiny quilt backs.  I’m talking about quilt backs a mere 2″ bigger than the front. That’s tight! Ideally, your quilt back should be 6″ – 10″ longer and wider than your top. There may be a pieced quilt back in your future!

You can read our tips on how to piece a quilt back and the 9 steps to matching prints on a quilt back, but how about a few ideas to fuel your creative piecing of that nice, big quilt back?

3 Approaches to a Pieced Quilt Back

  1. Add a contrasting fabric down the middle of your quilt back. Linda rented one of the hand guided machines this week and was gracious enough to let us photograph her backs. In the first quilt back, she’s added a coordinating print to two strips of solid.
    Quilt backs from Laurena's Longarm Quilting Boston
    In her second quilt back, she stitched strips of black on black prints and bordered them in red. What a great way to use up the leftovers!
    ideas to piece quilt backs
  2.  Apply the Rule of Thirds to your quilt back. The Rule of Thirds is used by artists and cinematographers to create a pleasing composition. The camera on your phone may have the horizontal and vertical grid which divides your frame into a “nine patch” or “tic tack tow.” Creating movement around the center quadrant is pleasing to your eye. How do you do this yourself? Take the dimensions of your quilt back and divide them by 3. Add a strip of fabric a third of the way across your back or create your own nine patch of made from stash fabric.
  3. Improvise your quilt back with leftover blocks

    Pieced quilt back from Modern Quilt Relish
    The improv quilt back from Modern Quilt Relish

There’s a lovely tutorial on how they approach piecing a quilt back on Modern Quilt Relish.  It makes a very interesting back, albeit more time consuming. A design wall helps to lay out options. Need a big design wall? Come to Sew Social, on first and third Thursdays. We’ve got loads of room to spread out and a wall covered in batting, ready for your quilt back improvisation.

As we head into summer, the spring madness of small quilt backs will probably calm down. However, what goes around, comes around! Be sure to keep in mind that a quilt back should be at least 6″ – 10″ longer and wider than your quilt top.

Laurena Rental Gammill Longarm Plus Quilting Machine Boston

5 Hints for First Time Longarm Quilters

Laurena Rental Gammill Longarm Plus Quilting Machine Boston
Does this view make your pulse race?

Our “Learn to Use a Longarm” classes are filling up quickly in 2016. Laurena always says that real quilting begins when you return, ready to use the longarm yourself for the first time after the class.

We’re there to support you on your longarm journey, helping you load the layers and preparing for the first stitch. When the sides are clamped and you’ve tied down your threads, it’s all yours!

Here are 5 Tips for Beginning Longarm Quilters

  1. Be nice to yourself! Feeling unsure is normal; after all, you’re trying something new. Probably you’ve gone to shows, liked photos on social media and read books, so you’ve seen fabulous examples of longarm quilting. You probably don’t see everyone’s first longarm quilting experience. Even if you’ve been machine quilting, remember that you are learning.
  2. Breathe. Are your shoulders hunched, or your jaw tight? Longarm quilting can be really pleasurable. Our hand guided machines all have adjustable table heights for a physically comfortable experience. A couple of long exhales before starting to quilt lets you release any anxiety built up.
  3. Choose a simple quilt top. Practice makes improvement. If the only quilt top you own has 5,000 pieces and you want to use rulers, and fill it with feathers, save it for another day. Make a simpler top, use muslin or a choose a charity quilt top for your beginning longarm quilting.
  4. Choose a simple quilting pattern. Organic, flowing shapes that suggest a motif are great for many quilts. You can practice smooth, consistent movement across the quilt which results in lovely, even stitching.
  5. Give your quilting the horseback view. Did you ever hear the adage that “if you can’t see it from the back of a galloping horse, no one else will?” It’s true!

Rome wasn’t built in a day, so enjoy your time with the longarm quilting machine. It’s about the quilting experience as much as it is the quilt.

Ok, quilters: Do you have any other suggestions or advice for newbie longarm quilters?


Laurena Longarm does Quilt Binding Boston

Heather Bailey’s Great Quilt Binding Guidance

Alanna led a session on binding quilts at the Common Cod Fiber Guild’s FiberCamp earlier this month. Turns out there’s some unfinished quilts in the world… are we surprised?

On the board, she outlined the basic steps (practicing her chalk manipulation skills). There were a lot of good questions.

Laurena Longarm does Quilt Binding Boston Don’t you have to create bias strips for your quilt? Not unless the edge of your quilt has scalloped or curved edges. Marianne Fons and Liz Porter have a great description of how to make bias strips in their Quilter’s Complete Guide.

How do you deal with all of that fabric?

  • Surround your sewing space with tables to support the weight of the quilt.
  • If your sewing machine isn’t set into a table, consider purchasing a table extension.
  • Most importantly, sew with one hand before the presser foot and the other hand after the presser foot. This helps guide the machine and ensures good stitch composition for all of your sewing.

Laurena traditionally shares Heather Bailey‘s fabulous hand out on how to do continuous quilt binding. Alanna shared the “waistband” tip on sewing binding strips.

Everyone had a chance to try sewing a machine binding on the second side with Jeremiah’s fabulous 1959 White sewing machine, whose stitches moved smoothly and strongly along the many layers of fabric.

Alanna also shared 3 tips for hand sewing:

  1. Thread your needle while it is still attached to the spool. This way you are sure to follow the spin of the thread, which makes things much easier for threading and stitching.
  2. Coat your thread with thread heaven. This conditioner reduces drag, doesn’t leave a residue and is safe in the long term for your fabrics. Alanna uses this for beading and embroidery as well.
  3. Keep your thread lengths less than the distance from your fingertip to your elbow. This reduces tangles.

Now, in true FiberCamp tradition, Alanna would love to hear any tips you have on binding quilts. What makes quilt binding easier for you?

9 Steps to Piece a Quilt Back with Print Fabrics

Some fabrics are just too fun to pass up. I love large scale prints, and many are great to cut up for blocks. Other yardage stays whole, destined for the quilt back.

Whoa is me when I don’t take the time to match up the patterns when piecing the back. I’ve done it once. Never again.

Many moons ago, I bought many yards of Hawaiian fabric on Kauai. One morning, I slapped two pieces of that fabric together for a large quilt back. No, worry, it wouldn’t bug me if the print repeats don’t match. Every time I put that quilt on a bed, the mismatched fabric drives me crazy. I could still snag a yard of this plumeria fabric on Etsy….

Laurena Longarm Quilting print quilt back sewing services Burlington MA
Plumeria hawaiian quilt print fabric

Alas fair quilter, you have been warned:

Follow these 9 steps to match the fabric on your quilt back.

Laurena Longarm Quilting Services Burlington, MA Boston Metro
Think how distracting this back would be if the circles weren’t matched!

  1. Measure the repeat of your fabric. With your ruler, measure a straight line from the top of design motif to the top of the next motif. This determines the offset needed to match the fabric.
  2. Cut one length of fabric equal to the desired quilt back length Add 6″ – 10″ to the quilt top length to figure out what that length should be. Add a bit more so you can square the quilt back with peace of mind.
  3. Cut a second length of fabric the Desired quilt back length PLUS Repeat PLUS Wiggle room. For example
    1.  Fabric repeat = 12″
    2. Quilt top = 60″
    3. Desired quilt back length 70″
    4. Matching fabric length = 70″ + 12″ + 4″ = 86″
  4. Cut the selvedge edge off one side of the first length of fabric.
  5. Press the newly trimmed edge back to create a half inch (0.5″) border down the entire length of the fabric.
  6. Pin baste the 2 lengths of fabric together. This is easier if you can lay it out on a table or floor. We use pins, but Laurena wonders if any of you have tried using double sided tape to baste. Gwen’s tried with glue sticks, but that’s a lot of stick if the quilt back is big!
  7. Baste the edges together. If you use matching thread, you don’t have to worry about removing the thread later. A ladder stitch between the fabrics at half inch (0.5″) intervals is fine.

    Laurena Longarm Quilting pieced back sewn
    Basting the layers together
  8. Sew the two lengths together along that pressed fold line.
  9. Trim the seam allowance. It doesn’t need to be a strict quarter inch, but be sure to cut off the selvedge of the second piece. Press to one side.

Pat yourself on the back! It may take time, but it’s not difficult to piece a quilt back with print fabric. Don’t forget to square your quilt back before you start quilting.

Now that you know how I do it, I’m excited to hear any tips you have to improve my process. Do comment and share your quilty goodness.

Piecing quilt backs not your thing? Then don’t worry, you can ask Laurena’s Longarm Quilting to piece your back for you.

After all, quilting is a pleasure!

Laurena Longarm Pieced Quilt Backs

5 steps to a pieced twin or queen size quilt back.

You’ve spent hours cutting, stitching, pressing, squaring and assembling fabric.

Hallelujah!

That quilt top

Is done.

Be sure to give the same loving attention to your back. If your top is larger than baby or lap size, chances are you’ll need to piece your back (although you can always choose the extra wide Sew Batik backs and be on your merry way :)).

Here are the 5 steps to making a quilt back from 42 – 44″ fabric. It doesn’t include the steps for matching large scale or directional fabric. I’ll do that in a future blog post.

1) Cut 2 pieces of fabric that are 6 – 10″ longer than the quilt top.

2) Match the pieces together at the selvedge edges. Sew one side with a 1″ – 1.5″ seam allowance (I know, after all of those quarter inch seam allowances, this looks enormous).

3) Press the seams to set the stitching.

4) Lining your ruler along the stitching line, trim to a ½” seam allowance with a rotary cutter. Now you’ve removed the selvedge edge. Selvedges are a stiffer weave and may shrink differently than the rest of your quilt fabric, even if you’ve already washed and pressed it. Also, why tempt the needle to skip as it works through seam allowances and a selvedge.

5) Press your seams to one side.

This quilt back results in a center seam in the middle of the back. There are those who believe that quilt backs shouldn’t have a center back seam. If you hang out with that group, then sew the selvedge edges together on both sides in Step 2. You’ll have an additional step of cutting the tube open to create the quilt back. Your quilt back will have 2 seams.

Quilt backs can be as much fun to piece as the top. Looking for ideas for piecing quilt backs? Want more? Check out Kathy Matthews’ adventures with quilt backs.

Now that you’ve pieced it, don’t forget to square your quilt back!

Squaring your Quilt Back

Longarm quilting doesn’t require basting the top, batting and backing together. It does require the fabric for your quilt back to be square. Here’s a  great video by Cindy Carey that covers the basics:

Our new handout for the Introduction to Longarm Quilting classes includes a link to this video, as well as the 10 steps to squaring your back.

 How to square a quilt back

  1. Press the backing fabric.
  2. Lining up the selvedge edges, fold the fabric in half, allowing it to hang from your fingertips as if it’s hanging on a clothes line. If your backing is large, ask someone to help you hold the length of the fabric.
  3. Look at the fold line dangling at the bottom edge. Is it wavy, gathered or curving? If so, use your fingertips to shimmy the selvedge edges to the left or right. You want the bottom fold to hang straight and flat.
  4. When the fabric doesn’t have any puckers, place pins every six inches at the top of the selvedge edges.
  5. Lay the folded backing fabric on a cutting mat and table. Smooth gently, keeping the fold line flat and bump free.
  6. Bring the fold line up to the selvedge edge (the back is now folded in quarters). Check that the fold line and selvedge edges are still pucker free and lying flat.
  7. Line up the bottom edge with a horizontal marked inch line on the cutting mat. Place a quilter’s ruler near one edge of the backing fabric, perpendicular to the horizontal lines of the cutting mat. If your back is folded in quarters and the ruler doesn’t extend past the selvedge and folded edges, either fold again or add a second ruler.
  8. Check that all layers of fabric protrude past the rulers.
  9. Using a rotary cutter, glide along the ruler edge to slice off excess fabric.
  10. Repeat steps 7 – 9 to square the opposite side.

At Laurena’s Longarm Quilting, we’re happy to make and square backs for you. Prices depend on the size of the back. Just email or call us for a quote.

Image of Laurena Longarm Quilting Boston binding strip

Sewing Binding Strips

Binding your quilt? You’re almost done! Then again, it’s not done. There’s still plenty of stitching pleasure are still ahead. (Don’t want to deal with binding? Laurena’s Longarm offers complete binding services).

For most of the quilts we bind, we cut 2.5″ strips on the grain, joining the strips on the bias.
One quilter at our studio shared her favorite way to remember which way to sew the bias strips with Gwen. which she called the pants method. bindingsew

  • Pretend your binding strips are a pair of trousers.
  • Sew the strips across the “waistband” of the pants.
  • Remember no one want the crotch of their trousers sewn in half!

You can stack a pile of “trousers” and chain sew the strips together. Trim off the excess fabric, set the seam and press the binding strips in half.

The Crafty Gemini  offers a slew of video tutorials and Alanna thought this one was a good introduction to binding your quilt.

Everyone has their binding tricks and trips. Do you have any favorite ways that makes sewing binding strips easier for you?

5 Tips for Using Minkee on Quilt Backs

Laurena sees more and more quilters arrive with Minkee quilt backs. This plush microfiber fabric feels scrumptious, making it totally irresistible for cozy baby or lap quilts. Before working on the first customer’s quilt with a Minkee back, Laurena checked out as many online sources to make sure it would be a success. Here’s 5 tips to using Minkee fabric on your quilt.

  1. These plush fabrics are very stable along the warp, but stretchy on the weft.  Keep the selvedges on your fabric and do not cut them off.
  2. Pin your zippers opposite the grain of the fabric (i.e. perpendicular to the selvedge edges). This will control the wiggly aspect of the fabric. It may mean more rolling, but the results are definitely worth it.
  3. Minkee is 60″ wide. Joann Fabrics sells a similar product called “Soft and Comfy” that is 58″ wide. Measure your backing to ensure that your fabric is  4″ – 8″ wider and longer than your quilt top. If you need to enlarge the back, add that extra panel in the middle of your back. This makes the back interesting and keeps it stable.
  4. Think about your batting choice.  Quilter’s Dream Cotton Select gives the quilt a fantastic drape. (Yesterday, motivated marathon quilter Susan finished 4 baby and lap quilts using Select and they looked fabulous!) Higher loft battings plus the plush backing will give your quilt a different dimensionality.
  5. Quilting stitches tend to disappear in the plush fabric. If you’re hoping to make a colorful quilted statement on the back, you may want to consider a heavy flannel instead of plush microfiber.

The folks at Fabric.com created one of the best videos on how to use Minkee, so I thought I’d share it with you.

http://youtu.be/3zc1zxgxsEc

How to bind your quilt

In a way, it’s starting backwards. Binding your quilt is what happens after the zippers are off and you’ve admired all of your hard work. Here’s a great video with tips to create a great binding. Am I keeping my eye on the goal?

And remember, Laurena offers binding services as well… just in case you’re on to your next top!