Tag Archives: quilt back

9 Steps to Piece a Quilt Back with Print Fabrics

Some fabrics are just too fun to pass up. I love large scale prints, and many are great to cut up for blocks. Other yardage stays whole, destined for the quilt back.

Whoa is me when I don’t take the time to match up the patterns when piecing the back. I’ve done it once. Never again.

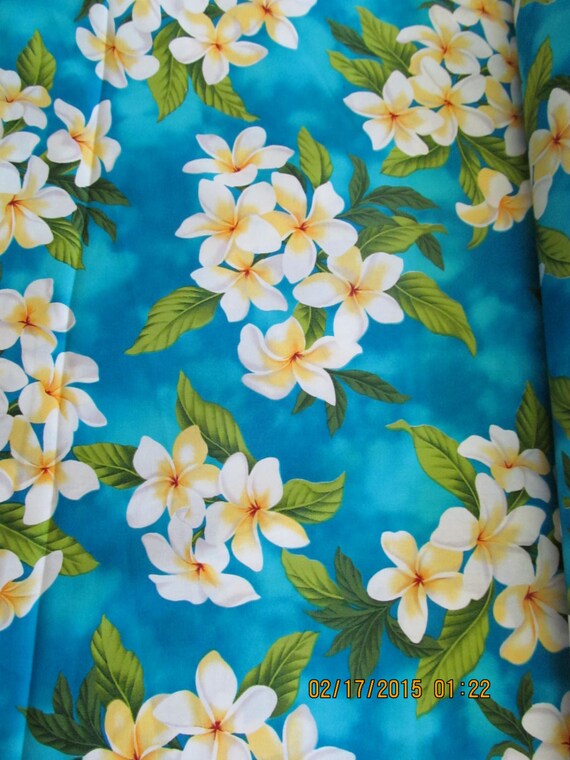
Many moons ago, I bought many yards of Hawaiian fabric on Kauai. One morning, I slapped two pieces of that fabric together for a large quilt back. No, worry, it wouldn’t bug me if the print repeats don’t match. Every time I put that quilt on a bed, the mismatched fabric drives me crazy. I could still snag a yard of this plumeria fabric on Etsy….
Laurena Longarm Quilting print quilt back sewing services Burlington MA
Plumeria hawaiian quilt print fabric

Alas fair quilter, you have been warned:

Follow these 9 steps to match the fabric on your quilt back.

Laurena Longarm Quilting Services Burlington, MA Boston Metro
Think how distracting this back would be if the circles weren’t matched!
  1. Measure the repeat of your fabric. With your ruler, measure a straight line from the top of design motif to the top of the next motif. This determines the offset needed to match the fabric.
  2. Cut one length of fabric equal to the desired quilt back length Add 6″ – 10″ to the quilt top length to figure out what that length should be. Add a bit more so you can square the quilt back with peace of mind.
  3. Cut a second length of fabric the Desired quilt back length PLUS Repeat PLUS Wiggle room. For example
    1.  Fabric repeat = 12″
    2. Quilt top = 60″
    3. Desired quilt back length 70″
    4. Matching fabric length = 70″ + 12″ + 4″ = 86″
  4. Cut the selvedge edge off one side of the first length of fabric.
  5. Press the newly trimmed edge back to create a half inch (0.5″) border down the entire length of the fabric.
  6. Pin baste the 2 lengths of fabric together. This is easier if you can lay it out on a table or floor. We use pins, but Laurena wonders if any of you have tried using double sided tape to baste. Gwen’s tried with glue sticks, but that’s a lot of stick if the quilt back is big!
  7. Baste the edges together. If you use matching thread, you don’t have to worry about removing the thread later. A ladder stitch between the fabrics at half inch (0.5″) intervals is fine.

    Laurena Longarm Quilting pieced back sewn
    Basting the layers together
  8. Sew the two lengths together along that pressed fold line.
  9. Trim the seam allowance. It doesn’t need to be a strict quarter inch, but be sure to cut off the selvedge of the second piece. Press to one side.

Pat yourself on the back! It may take time, but it’s not difficult to piece a quilt back with print fabric. Don’t forget to square your quilt back before you start quilting.

Now that you know how I do it, I’m excited to hear any tips you have to improve my process. Do comment and share your quilty goodness.

Piecing quilt backs not your thing? Then don’t worry, you can ask Laurena’s Longarm Quilting to piece your back for you.

After all, quilting is a pleasure!

Laurena Longarm Quilting pieces backs near Boston

We can piece that back for you!

What to do if you just don’t feel like piecing together that quilt back?

Bring it to Laurena’s Longarm Quilting!
We construct quilt backs in all sizes, from baby to California King.

Our costs are quite reasonable and you can count on a solidly pieced back.  Take a peek at our brochure for a complete list of the prices and services available, but here’s the basic pricing for backs.

Quilt Back Piecing (priced by square inch)
Quilt Top Size(length x width) Single Seam Surcharge formatch, multi seam
<2,000 sq inch $15 $10
2,001 – 6,999 $20 $10
7,000 – 9,999 $25 $10
10,000 + $30 $15

Let’s say you have a queen size quilt that measures 62″ x 84″. Its area (length times width) is 5,208″. If you just need one single seam, the cost would be $20. Does your fabric have a large scale or directional print that needs matching? Then it would cost $30.

(That reminds me, I said I’d write a post on how to match directional fabrics…)

If you’ve been a longtime Laurena customer, you immediately notice that this table is  more complex than our old flat rate. It makes sense that prices reflect the actual time spent on the work involved, right?

Any questions? We’re always happy to help!

Squaring your Quilt Back

Longarm quilting doesn’t require basting the top, batting and backing together. It does require the fabric for your quilt back to be square. Here’s a  great video by Cindy Carey that covers the basics:

Our new handout for the Introduction to Longarm Quilting classes includes a link to this video, as well as the 10 steps to squaring your back.

 How to square a quilt back

  1. Press the backing fabric.
  2. Lining up the selvedge edges, fold the fabric in half, allowing it to hang from your fingertips as if it’s hanging on a clothes line. If your backing is large, ask someone to help you hold the length of the fabric.
  3. Look at the fold line dangling at the bottom edge. Is it wavy, gathered or curving? If so, use your fingertips to shimmy the selvedge edges to the left or right. You want the bottom fold to hang straight and flat.
  4. When the fabric doesn’t have any puckers, place pins every six inches at the top of the selvedge edges.
  5. Lay the folded backing fabric on a cutting mat and table. Smooth gently, keeping the fold line flat and bump free.
  6. Bring the fold line up to the selvedge edge (the back is now folded in quarters). Check that the fold line and selvedge edges are still pucker free and lying flat.
  7. Line up the bottom edge with a horizontal marked inch line on the cutting mat. Place a quilter’s ruler near one edge of the backing fabric, perpendicular to the horizontal lines of the cutting mat. If your back is folded in quarters and the ruler doesn’t extend past the selvedge and folded edges, either fold again or add a second ruler.
  8. Check that all layers of fabric protrude past the rulers.
  9. Using a rotary cutter, glide along the ruler edge to slice off excess fabric.
  10. Repeat steps 7 – 9 to square the opposite side.

At Laurena’s Longarm Quilting, we’re happy to make and square backs for you. Prices depend on the size of the back. Just email or call us for a quote.