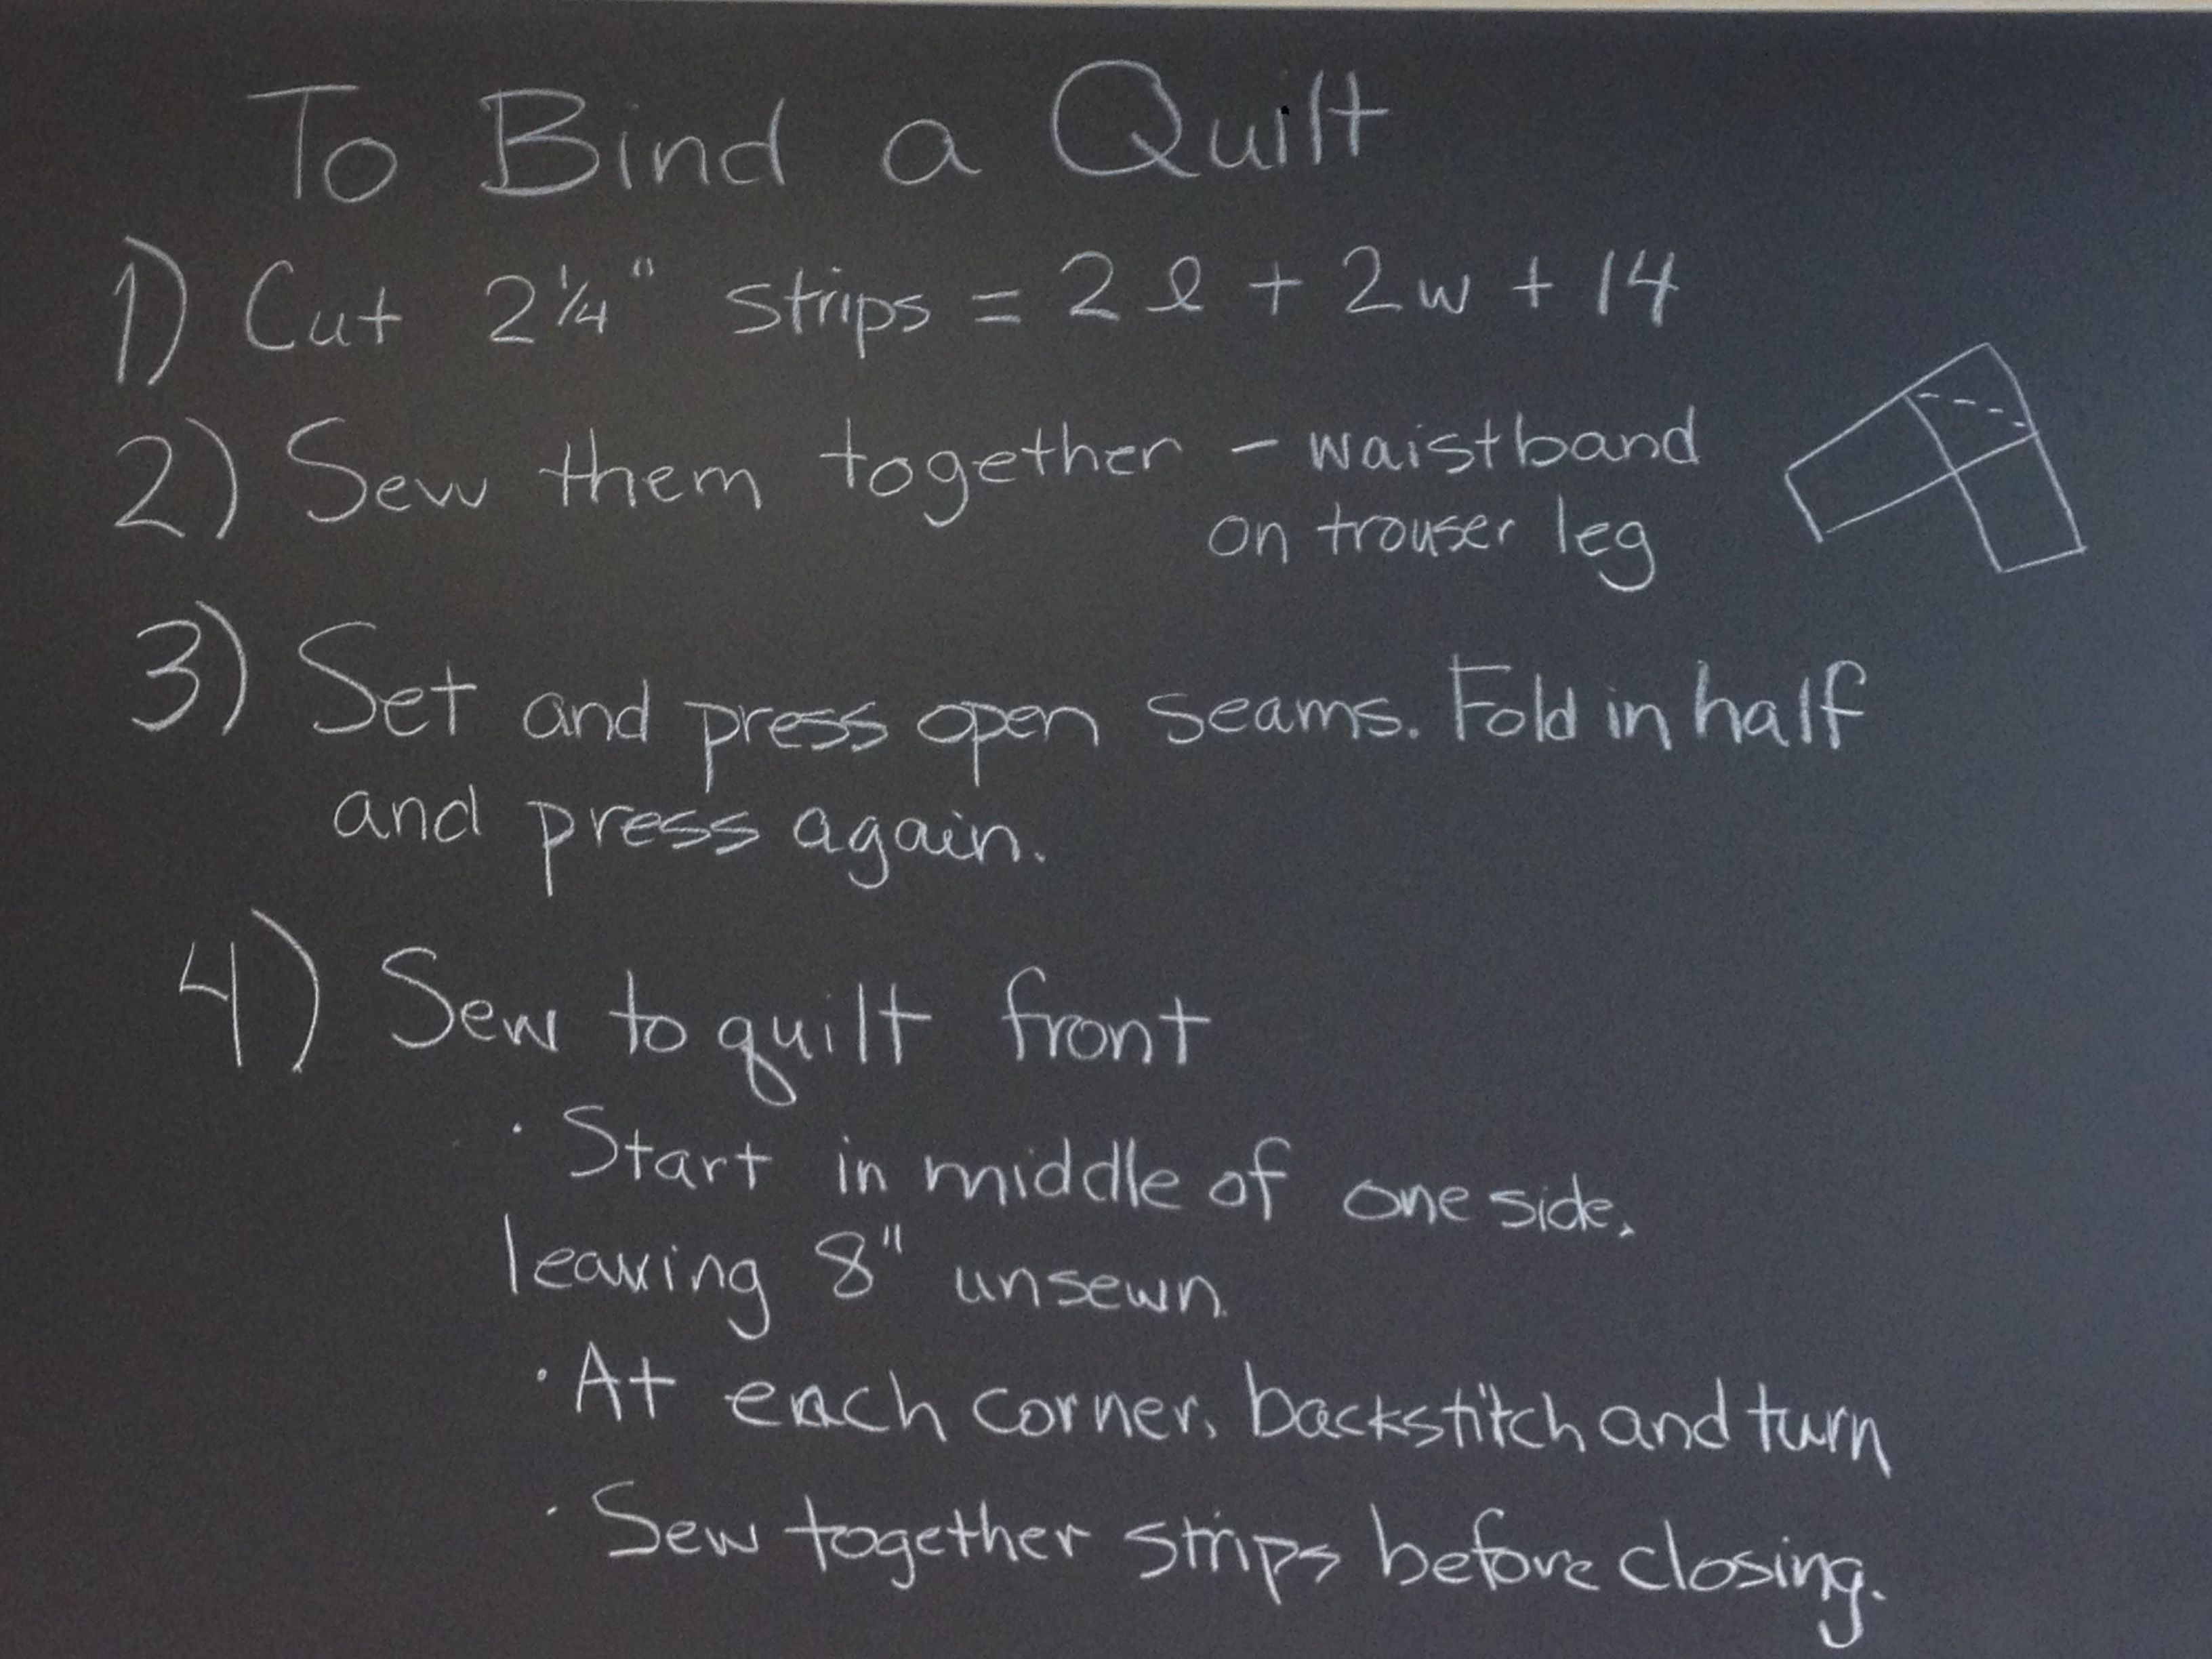
Alanna led a session on binding quilts at the Common Cod Fiber Guild’s FiberCamp earlier this month. Turns out there’s some unfinished quilts in the world… are we surprised?
On the board, she outlined the basic steps (practicing her chalk manipulation skills). There were a lot of good questions.
 Don’t you have to create bias strips for your quilt? Not unless the edge of your quilt has scalloped or curved edges. Marianne Fons and Liz Porter have a great description of how to make bias strips in their Quilter’s Complete Guide.
How do you deal with all of that fabric?
- Surround your sewing space with tables to support the weight of the quilt.
- If your sewing machine isn’t set into a table, consider purchasing a table extension.
- Most importantly, sew with one hand before the presser foot and the other hand after the presser foot. This helps guide the machine and ensures good stitch composition for all of your sewing.
Laurena traditionally shares Heather Bailey‘s fabulous hand out on how to do continuous quilt binding. Alanna shared the “waistband” tip on sewing binding strips.
Everyone had a chance to try sewing a machine binding on the second side with Jeremiah’s fabulous 1959 White sewing machine, whose stitches moved smoothly and strongly along the many layers of fabric.
Alanna also shared 3 tips for hand sewing:
- Thread your needle while it is still attached to the spool. This way you are sure to follow the spin of the thread, which makes things much easier for threading and stitching.
- Coat your thread with thread heaven. This conditioner reduces drag, doesn’t leave a residue and is safe in the long term for your fabrics. Alanna uses this for beading and embroidery as well.
- Keep your thread lengths less than the distance from your fingertip to your elbow. This reduces tangles.
Now, in true FiberCamp tradition, Alanna would love to hear any tips you have on binding quilts. What makes quilt binding easier for you?
